The index.html in the htdocs folder which you are viewing here, is the basic management html (the
index.html in the file
structure on your portable USB drive:
\init_usb_no\htdocs\index.html). It was
created with NVU, an html editing and publishing program which will be explained after the initial
installation of
the required hardware and
software.
The creation of this folder structure is intended to establish a
convention that will simplify the creation of/transfer to a web site
and will also simplify accessing, finding, and testing your files for
web-based access on any computer or server.
It is assumed that seminar participants have a working knowledge of how to find and create folders via right clicking the Start button, and clicking on Explore on the XP tool bar.
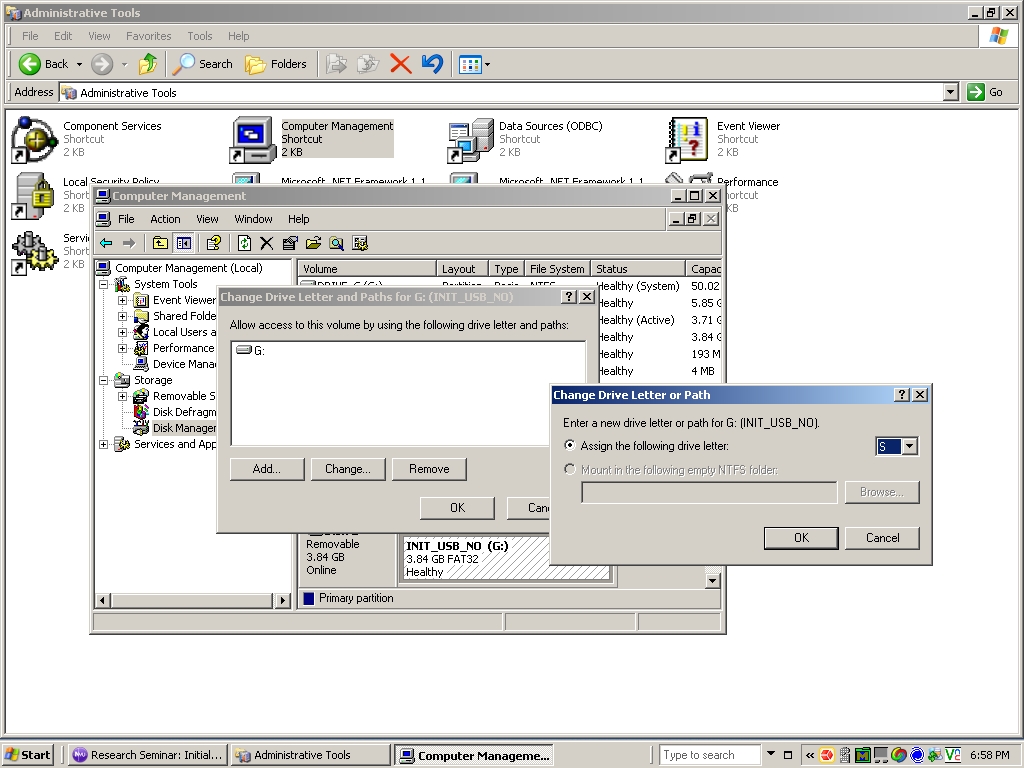
1)You should begin by giving your flash USB drive a permanent drive
assignment. This is
done by using the administrative tools that come with XP, the final
screen of which appears below. Note that the initial drive
designation for the flash USB drive on my computer was 'G'.
It may be initially assigned differently on different laptops.
2) The next step is to change
your flash USB drive name, and change the first directory on
the usb flash drive to your
initials underscore,
usb underscore 01. Never use hyphens
in a drive or directory name and only before a sequential number in a
file name. Use lower case letters wherever possible in all labeling of
directories and files.
Links to all subsequent htmls will follow from the index.html.
All
software will be placed in the software subdirectory on the
USB
flash drive.
For security's sake you should periodically copy the USB flash drive to
the laptop hard drive and to the USB backup drive. Flash drives and
hard drives will crash. The only security for electronic note
taking, research and writing, is to keep files backed up/transferred to
a 'live' storage environment on a regular basis. I would suggest that
this be at the end of every working hour or so.
3) Assuming you have Firefox2 as your default browser, the next step is to
install Zotero note taking software (http://zotero.org) and
Nvu html editing software (free), which is an open source,
free
html editor. The software will be found in the the software
directory
on the usb drive once copied there by the instructor. In
installing Zotero, be sure to use the tools option to require that the
Zotero files are in a subdirectory under htdocs labeled zotero_database. To install Nvu in Firefox, a separate program called http://www.launchy.net/ must be used. Instructions will be given in class if self-installation does not progress smoothly.
5) Next install the ABYSS personal server
software found in the software directory. This is
probably the most complex of the software packages to set up and to
coordinate with NVU, but it will help you prepare and manage your
research files as a web site and will provide a simple means of testing
hyperlinks to be certain they work as they should on any web site.
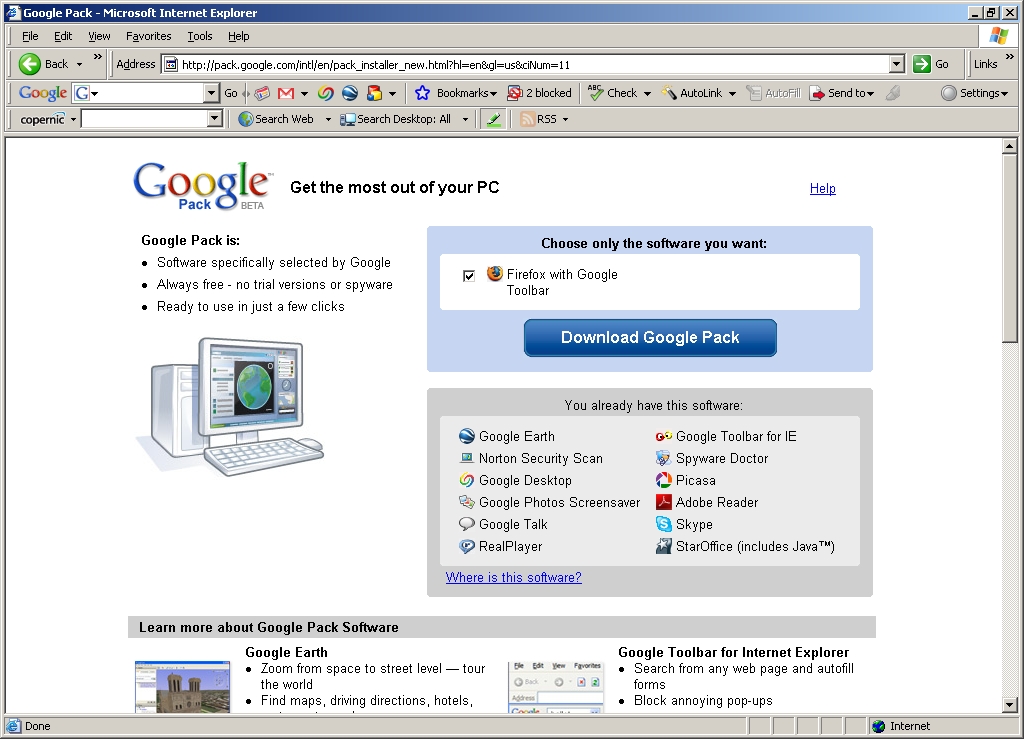
6) Next install Google's
package of free software, especially word
processing, desktop search, and Google Earth. When installing
Google Earth, be sure that you have administrator privileges on your
laptop or it will not install properly.
The following indicates the Google software I have installed.
While the illustrations are images captured from an Internet
Explorer browser, the instructions are the same using Firefox2 as your
default browser.
For research purposes, Google Earth, Google Desktop, Adobe
Reader, and Star Office are the minimum requirements. You
must be on line on the internet to install this software.
7) Next install two useful file management programs, one for multiple
renaming of files (mrsetup.exe) and the other for global
searching and replacing text (sr.exe). Both programs are located
in the software directory.
8) No matter how careful you may be in arranging and recording
your files, something is bound to get lost or be misplaced in the wrong
directory. An excellent free software program for indexing
any drives attached to your laptop is Copernic desktop indexing
software.
A copy is in the software directory, but
as with all the recommended software it is always a good idea to check
the web site to be certain you have installed the most up to date
version. Copernic along with Google Desktop Search will not only
help you find misplaced files, it will also simulate how your files
would be indexed by web crawlers when placed on a web server accessible
to the public.
Recommended software:
PDF driver software for exporting to
PDF (the most inexpensive and effective I have found to date is the
docucom/Zeon pdf printer driver available from http://www.pdfwizard.com/eng/include/index.asp (single user license ca. $49-99) required).
Getting Firefox2, Zotero, NVU, the Abyss personal web sever, and the Google
programs to work seamlessly together for research and writing requires
careful attention to settings in the software.
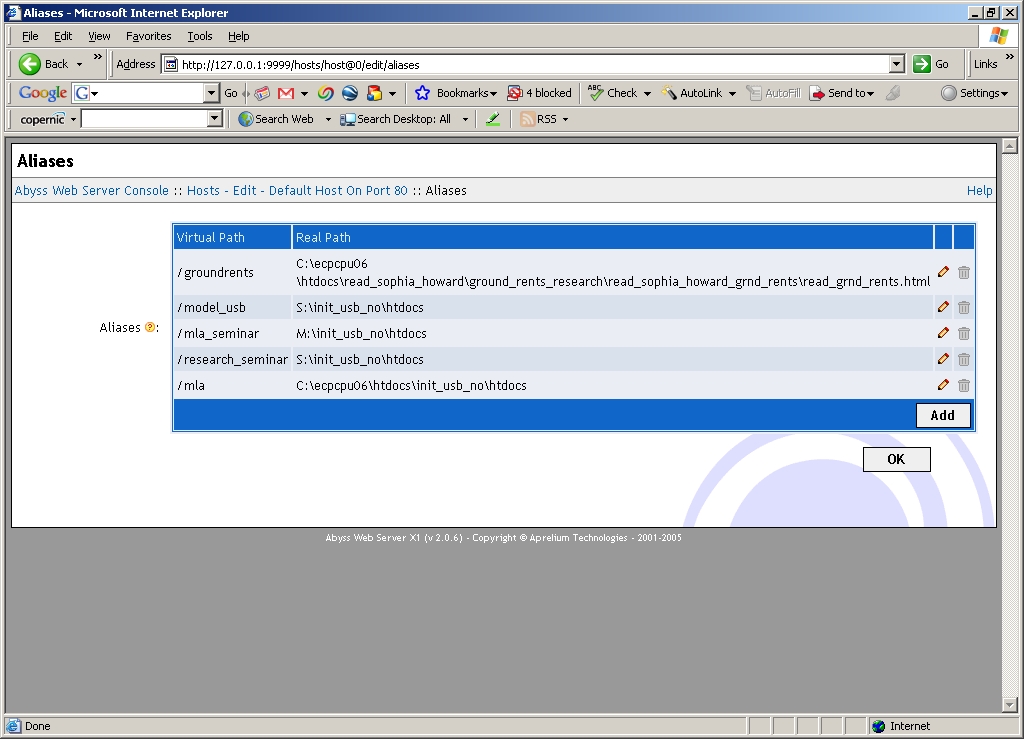
1) The first step to interoperability is to prepare the settings in the
Abyss personal web
server by setting the default in Abyss to the master index html on
the lap top and and creating an alias to its duplicate on the USB Flash
Drive..
Set aliases as needed to access other files on other drives using the personal web server. For example:
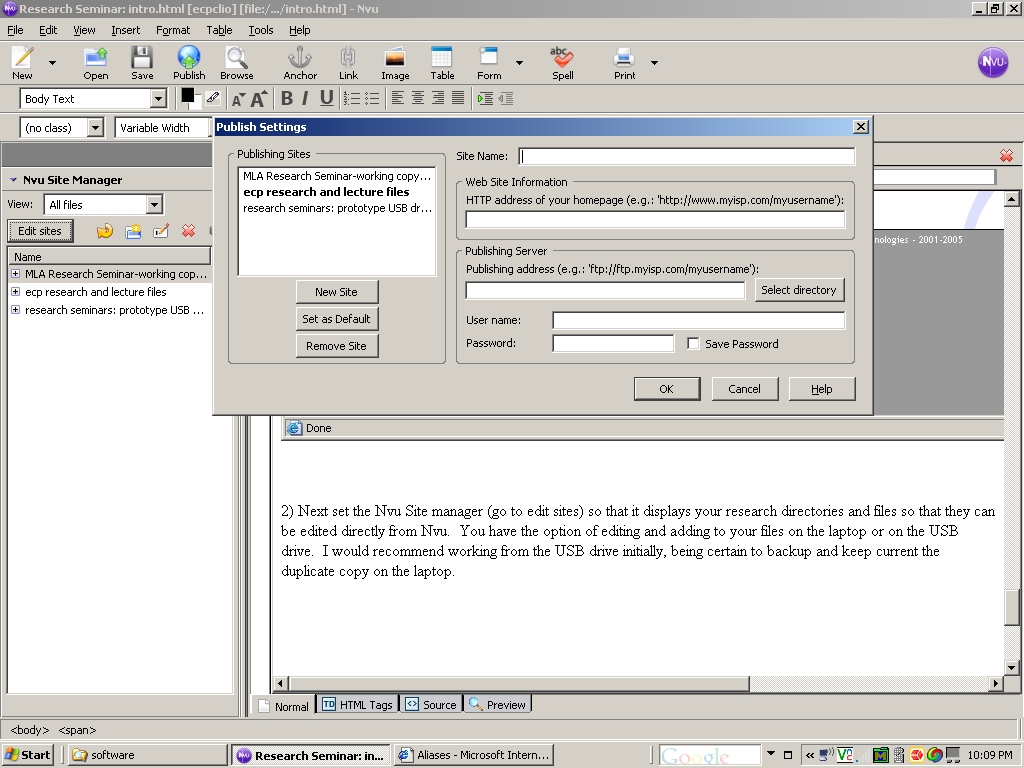
2) Next set the Nvu Site manager (go to edit sites) so that it displays
your research directories and files so that they can be edited directly
from Nvu. You have the option of editing and adding to your files
on the laptop or on the USB drive. I would recommend working from
the USB drive initially, being certain to back up and keep current the
duplicate copy on the laptop.
Using
"localhost" or "localhost" plus alias- for example
http://localhost/research_seminar in the IE browser, will simulate a
web
environment and permit editing of linked htmls with Nvu. Note
that
when you access an html through the personal web server (Abyss), be
sure to access and edit the files displayed on the Nvu Site Manager,
having closed the first tab. You could edit in the
first tab but you will then have to be very careful how you publish
your editing back to the web site.
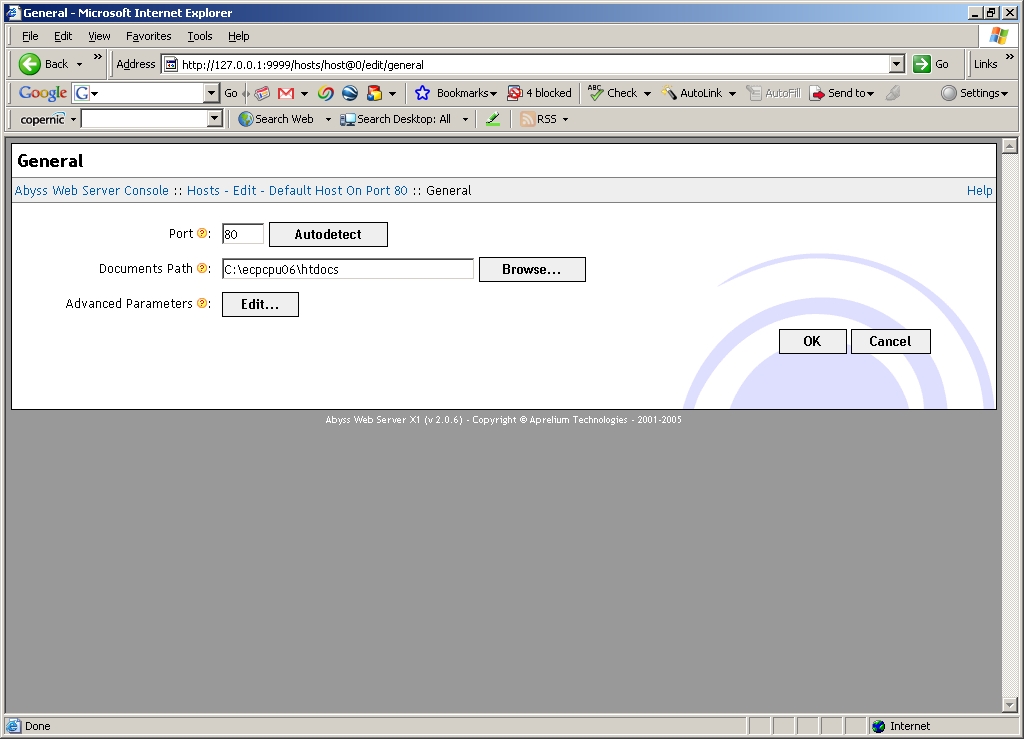
Also always be certain that all research and writing files are in sub
directories below the htdocs directory in which the master/initial
index.html resides. With Abyss installed, you can test all of
your web intended htmls by using your browser and place
http://localhost as the requested URL. Note that for this to work
successfully you must have created a master index.html in your httdocs
subdirectory that links to your web pages.
With the required software installed and the settings in place to integrate Nvu editing software with ABYSS, proceed to research and writing to begin applying the installed software and hardware to your research and writing.
Note that all instructions and software programs as of 9/5/2007 are available to download as a zip file created by http://www.7-zip.org/ which is included in the software directory.